
If you run an online store, you’re likely always on the lookout for ways to automate your operations and deliver better experiences to your customers.
WooCommerce webhooks can help automate tasks and keep your store running 24*7.
If you’re new to WooCommerce webhook or want to improve your existing setup, this blog will explain everything you need to know.

What Are WooCommerce Webhooks
Let’s start with the basics: what are WooCommerce webhooks?
A webhook is a tool that lets one application connect to another.
When something happens in one application (like an order being placed in your WooCommerce store), a webhook can notify another application (such as a payment processor or customer relationship management system) to perform a specific action.
Bonus Read: WooCommerce PCI Compliance
WooCommerce webhooks can simplify your workload by automating tasks like order processing, customer notifications, and inventory management.
By setting up webhooks, you can spend less time on manual tasks and more time on growing your business.
On average, stripe webhook secret woocommerce will reduce 30% manual work and 40% increase in automatic workflows.
You can check the user trend:
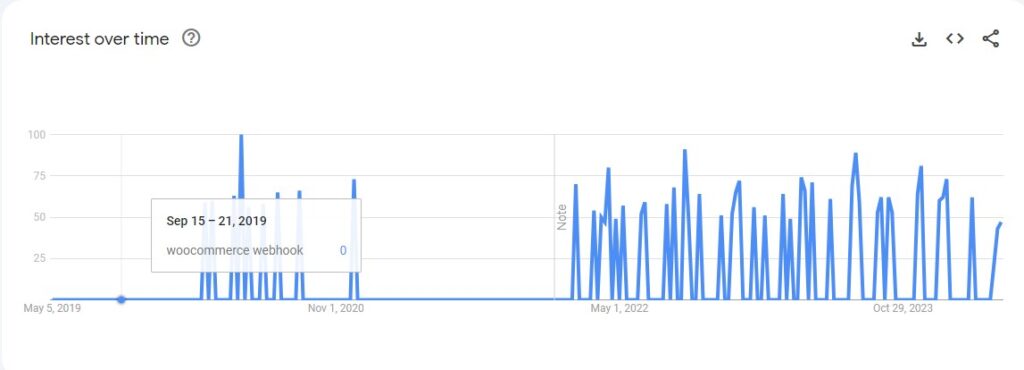
Source: Google trends
Woocommerce Webhooks Example
Imagine a postman delivering mail. You send a letter, and the postman delivers it without you having to do anything else.
Webhooks make sure that when an event occurs in WooCommerce, the information is automatically sent to the right place—without any manual work or additional cost on your part.
WooCommerce Webhooks List
WooCommerce offers various webhook events that you can use to automate your e-commerce store.
Here are the top 10 WooCommerce webhook events:
Order Created
Triggered when a new order is created in your store.
Order Updated
Triggered when an existing order is updated (e.g., order status change, order modification).
Order Deleted
Triggered when an order is deleted from your store.
Product Created
Triggered when a new product is added to your WooCommerce store.
Product Updated
Triggered when an existing product is updated.
Product Deleted
Triggered when a product is removed from your store.
Customer Created
Triggered when a new customer account is created in your store.
Customer Updated
Triggered when an existing customer’s information is updated.
Customer Deleted
Triggered when a customer account is deleted.
Coupon Created
Triggered when a new coupon is added to your store.
Setting Up WooCommerce Webhooks API
Now that you know what WooCommerce webhooks are, let’s explore how to set them up for your store.
You need to specify the event you want to trigger the webhook and the endpoint where the information should be sent.
Steps to Set Up a WooCommerce Webhook
- Log in to your WooCommerce store.
- Go to the Settings tab in the WooCommerce dashboard.
- Click on the “Advanced” tab, then select “Webhooks.”
- Click “Add Webhook” to create a new webhook.
- Choose the event that will trigger the webhook.
- Enter the endpoint URL where the information should be sent.
- Choose the delivery method (usually POST).
- Save the webhook settings.
- Monitoring and Troubleshooting
- Once you’ve set up your webhooks, monitoring their performance and fixing any problems is important. Watch the webhook logs to make sure data is being sent correctly and promptly.
How to Customize WooCommerce Webhook Payload Code
To customize the WooCommerce webhook payload, you can use WordPress hooks to modify the data before it’s sent.
Utilize the woocommerce_webhook_payload filter to intercept and adjust the payload according to your needs.
You can add, remove, or modify the data within the payload based on the event being triggered, tailoring the information to your specific requirements.
Here’s an example of how to use the woocommerce_webhook_payload filter in your theme’s functions.php file or a custom plugin:
add_filter(‘woocommerce_webhook_payload’, ‘customize_webhook_payload’, 10, 4);
function customize_webhook_payload($payload, $resource, $resource_id, $webhook) {
// Customize the payload as desired
// For example, you can add a new key-value pair
$payload[‘custom_data’] = ‘Your custom value’;
// Return the modified payload
return $payload;
}
In this example, the customize_webhook_payload function receives the current payload, the resource type, resource ID, and webhook object as parameters.
You can modify the payload by adding, updating, or removing data, then return the modified payload.
Integrating Stripe Webhooks with WooCommerce
Payment processing is a vital part of any e-commerce business.
Many store owners use Stripe as their payment gateway. Integrating Stripe webhooks with WooCommerce can bring more automation to your operations.
Understanding Stripe Webhook Secret WooCommerce
When integrating Stripe with your WooCommerce store, you will encounter the term “Stripe webhook secret WooCommerce.”
This is a security key that verifies the authenticity of webhook notifications sent from Stripe to your WooCommerce store.
Bonus Tip: Is WooCommerce Safe?
How to Integrate Stripe Webhooks with WooCommerce
- Log in to your Stripe account.
- Go to the “Developers” tab and select “Webhooks.”
- Click on “Add Endpoint” to create a new webhook endpoint.
- Enter the endpoint URL from your WooCommerce store.
- Choose the events you want Stripe to notify your store about, such as payment succeeded or payment failed.
- Copy the signing secret from Stripe.
- Paste the signing secret in the appropriate field in your WooCommerce Stripe settings.
- Save your settings and test the integration.
How to Set Up Woocommerce Webhook Events with Zapier
Setting up WooCommerce webhook events with Zapier allows you to automate tasks and workflows by connecting WooCommerce to a wide variety of other apps and services.
Here’s how to set it up:
Log in to Zapier
Sign in to your Zapier account or create a new account if you don’t have one yet.
Create a New Zap
Once you’re logged in, click on “Create Zap” to start creating a new workflow.
Choose WooCommerce as the Trigger
In the Zap setup process, search for WooCommerce in the trigger apps list and select it.
Select a Trigger Event
Choose the WooCommerce event that you want to trigger the Zap. For example, you can choose events like “New Order,” “Order Updated,” or “Product Created.”
Connect Your WooCommerce Account
If you haven’t already connected your WooCommerce account to Zapier, you’ll need to do so now. Follow the prompts to authorize Zapier to access your WooCommerce store.
Test the Trigger
Once your account is connected, test the trigger event to ensure Zapier is receiving data from your WooCommerce store.
Choose an Action App
After setting up the trigger, choose an action app where you want to send the data from WooCommerce.
You can connect your store to a range of apps, such as Slack, Google Sheets, Mailchimp, or any other app available in Zapier’s extensive library.
Set Up the Action
Select the action event in the chosen app, such as sending a message, creating a record, or updating data. Customize the action based on your needs using the data from the WooCommerce trigger.
Test the Zap
After configuring the action, test the Zap to make sure everything is working as expected.
Name and Turn on the Zap
Once the test is successful, give your Zap a name that reflects its purpose and turn it on.
You can integrate WooCommerce with Zapier and set up webhook events to automate tasks and workflows across different apps and services.
This can help you save time.
How to Test Woocommerce Webhook for Startups and SMEs
Testing a WooCommerce webhook is important to so that data is being transmitted correctly and that the webhook is functioning as expected.
Here’s how to test a WooCommerce webhook:
Set Up a Testing Endpoint
First, create a testing endpoint where you can receive webhook data. This can be a tool like Webhook.site or RequestBin.
Copy the endpoint URL, which you will use as your webhook destination.
Configure the Webhook
In your WooCommerce store, navigate to the “Settings” menu, then to the “Advanced” tab, and select “Webhooks.”
Click “Add Webhook” and set up a new webhook
Name
Give your webhook a descriptive name.
Status
Set the status to “Active.”
Topic
Choose the event you want to trigger the webhook, such as “Order Created” or “Product Updated.”
Delivery URL
Paste the URL of your testing endpoint.
Secret
Set a secret key to secure the webhook.
Delivery method
Choose the HTTP method, usually POST.
Save the Webhook
Save the webhook configuration to activate it.
Trigger the Webhook
Perform the action in your WooCommerce store that will trigger the webhook event.
For example, if you chose “Order Created” as the event, place a test order in your store.
Check the Testing Endpoint
Once you’ve triggered the event, check the testing endpoint you set up in step 1. You should see a request from your WooCommerce store with the data payload.
Verify the Payload
Examine the data payload to ensure it contains the expected information. Check for any missing fields or incorrect data.
Troubleshoot Any Issues
If you encounter problems, review your webhook settings and verify the endpoint URL. Check your server logs for any errors during data transmission.
Repeat Tests
Perform additional tests if necessary, changing parameters or events to ensure your webhook behaves as expected in different scenarios.
Where to Customize Woocommerce_Thankyou Webhook
To customize the woocommerce_thankyou webhook, use the woocommerce_thankyou hook in your WordPress theme’s functions.php file or in a custom plugin.
This hook allows you to execute custom code when an order is completed and the thank you page is displayed, letting you modify webhook payloads or perform additional actions as needed.
What Triggers a Woocommerce Webhook
WooCommerce webhooks can be triggered by various events in your online store:
Such as a new order being placed, an order being updated or completed, a product being created or updated, or a customer account being created or updated.
These events initiate the webhook, sending data to the specified endpoint for further processing or integration with other applications.
Benefits of Integrating Stripe Webhooks
Integrating Stripe webhooks with WooCommerce helps you manage payments.
You’ll receive instant notifications for events like successful payments, refunds, and disputes.
This allows you to respond quickly and keep your customers informed.
Stripe WooCommerce Webhook Events
So, what kind of webhook events can you expect when integrating Stripe with WooCommerce?
There are several, each providing you with valuable information about your payment processing and customer interactions.
Key Stripe Webhook Events
Payment Succeeded
Notifies you when a payment is successfully processed.
Payment Failed
Alerts you if a payment attempt fails so you can follow up with the customer.
Charge Refunded
Informs you when a customer has been issued a refund.
Customer Created/Updated
Alerts you when a customer profile is created or modified.
Invoice Payment Succeeded
Notifies you when an invoice payment is successful.
How to Use This Information
Receiving notifications for these events lets you stay on top of your payment processing and customer relationships.
For example, if a payment fails, you can quickly reach out to the customer and help them resolve the issue.
Conclusion
WooCommerce webhooks can greatly enhance your e-commerce experience by automating critical processes and ensuring smooth communication between your store and other applications.
Integrating Stripe webhooks with WooCommerce allows you to automate payment processing and stay on top of customer interactions.
Take the time to set up and monitor your webhooks properly. Doing so will free up your time and resources so you can focus on what really matters: growing your business and delighting your customers.
FAQs
What is the Stripe webhook secret in WooCommerce?
The Stripe webhook secret in WooCommerce is a security key that verifies the authenticity of webhook notifications sent from Stripe to your WooCommerce store.
How can I troubleshoot issues with my WooCommerce webhooks?
Monitor the webhook logs in your WooCommerce dashboard to check for any issues with data transmission.
If you encounter problems, review your webhook settings and endpoints to make sure everything is set up correctly.
Testing the integration can also help identify and resolve issues.
Our Relevant Services
WooCommerce Integration Services
WooCommerce Migration Services
Magento to WooCommerce Migration